Now Reading: Can You Really Bake Fluffy Bread Without Gluten?
-
01
Can You Really Bake Fluffy Bread Without Gluten?

I’ve been a chef for over seven years. I’ve heard a lot of stories from people about their baking struggles. Many people try to make gluten-free bread. They follow the recipe. But the bread comes out dense. It is crumbly. It is flat. It is not what they want. It is a very common problem.
People think baking gluten-free bread is impossible. I am here to tell you it is not. You can bake bread that is delicious and fluffy. It is possible. The secret is that you cannot just swap one flour for another. You cannot take out the wheat flour and put in a single gluten-free flour. It does not work. Gluten-free baking is a science. You have to understand a few key things.
I want to share my secrets with you. We will talk about the right flours to use. We will talk about how to work with the dough. We will go through some simple recipes that give you great results every time. Get ready to bake bread that is light and airy.

The Secret to a Perfect Gluten-Free Flour Blend
This is the most important thing to know. A single gluten-free flour will not work well. Wheat flour has gluten. Gluten is what gives bread its structure. It makes it stretchy and chewy. Gluten-free flour does not have this. You have to create a mix of flours that works like wheat flour. You need a balanced blend.
A good gluten-free blend has three parts. You need a starch, a whole-grain flour, and a binder. Each part has a job.
The “Structure” Flour
Starches give your bread elasticity. They make it light. They give it a good texture. You want your bread to be soft. You want it to not crumble. The starches help with this. The most common starches are tapioca starch or cornstarch. I also use potato starch sometimes. Tapioca starch is great. It gives the bread a little bit of chewiness. It helps the bread hold its shape.
The “Protein” Flour
This is the flour that gives the bread flavor and fiber. It gives the bread its body. You do not want to use too much of this. It can make the bread too heavy. I like to use a whole-grain flour like brown rice flour or sorghum flour. Brown rice flour is a good base. It is affordable and has a mild flavor. Sorghum flour has a slightly sweet, mild flavor. It works well in bread. I sometimes use buckwheat flour. It gives a nutty flavor. The key is to find a whole-grain flour you like and use it in the right amount.
The “Binder”
This is the non-negotiable part. A binder is what holds everything together. It is what keeps the bread from crumbling. Gluten-free bread needs this. The most common binders are xanthan gum or psyllium husk powder. Xanthan gum is a great choice. You only need a small amount. It makes the dough more elastic. It helps trap the gas bubbles from the yeast. This makes the bread rise better. Psyllium husk powder is also very good. It gives the bread a soft texture. It adds a little fiber. This is the secret. You must use a binder.
Here is a simple recipe for a homemade all-purpose gluten-free flour blend. I use this one all the time.
- 2 cups of brown rice flour
- 1 cup of sorghum flour
- 1 cup of tapioca starch
- 2 teaspoons of xanthan gum
You can mix these all together. Then you can store it in a container. You can use it in place of a store-bought gluten-free flour blend. This blend works for almost any recipe.
Mastering the Art of Gluten-Free Dough
Making gluten-free dough is different from making regular dough. This is a good thing. It is not harder. It is just different. Many people try to treat it like wheat dough. This is a mistake.
Hydration is Key
Gluten-free flour needs more liquid than wheat flour. It is very thirsty. The dough will look very wet and sticky. This is normal. This is what you want. You must let the dough sit for a few minutes. The flour needs time to absorb the liquid. I usually let it sit for about 10 minutes. The dough will thicken up a little. This step makes the final bread much better.
Don’t Knead
With wheat bread, you have to knead the dough. This develops the gluten. Gluten-free dough does not have gluten. You do not need to knead it. You just need to mix everything together well. I use a stand mixer with a paddle attachment. You can also use a spoon. Just mix until everything is combined. Overmixing can make the dough tough. A simple mix is enough.
The Rise
Gluten-free bread will not double in size like wheat bread. It will not get that big. But it will rise. You need to put the dough in a warm place. I sometimes turn my oven on for a few minutes and then turn it off. I put the dough inside the warm oven to rise. This helps the yeast work. The dough will get a little bit bigger. It will get puffy. A good rise makes the bread light.
Simple & Foolproof Gluten-Free Bread Recipes
These recipes highlight the principles we just talked about. I have made them many times. They work. They give great results.
Recipe 1: The “No-Fail” Sandwich Loaf

This is my go-to recipe. It is perfect for everyday use. It makes a loaf that is great for sandwiches and toast. It has a soft crumb and a good crust.
- 2 cups of your homemade gluten-free flour blend
- 1 tablespoon of sugar
- 1 teaspoon of salt
- 1 tablespoon of active dry yeast
- 1 ¼ cups of warm water
- 2 tablespoons of melted butter or olive oil
- 1 large egg
First, I mix the dry ingredients in a large bowl. I use my flour blend, sugar, salt, and yeast. In a separate bowl, I whisk the warm water, melted butter, and egg. Then I pour the wet ingredients into the dry ingredients. I mix with a spoon or a stand mixer for about 2 minutes. The dough will be thick and sticky. This is normal.
I grease a loaf pan. I spoon the dough into the pan. I use a spatula to spread it evenly. I wet my hands with water and smooth the top. I let the loaf rise in a warm place for about 30 to 45 minutes. The dough will get puffy. I bake it at 375°F (190°C) for about 30 minutes. The top will be golden brown. I let it cool completely before I slice it. This is important. If you slice it when it is warm, it will get gummy inside. This recipe gives me a great loaf every time.
Recipe 2: The Crusty Artisan Loaf
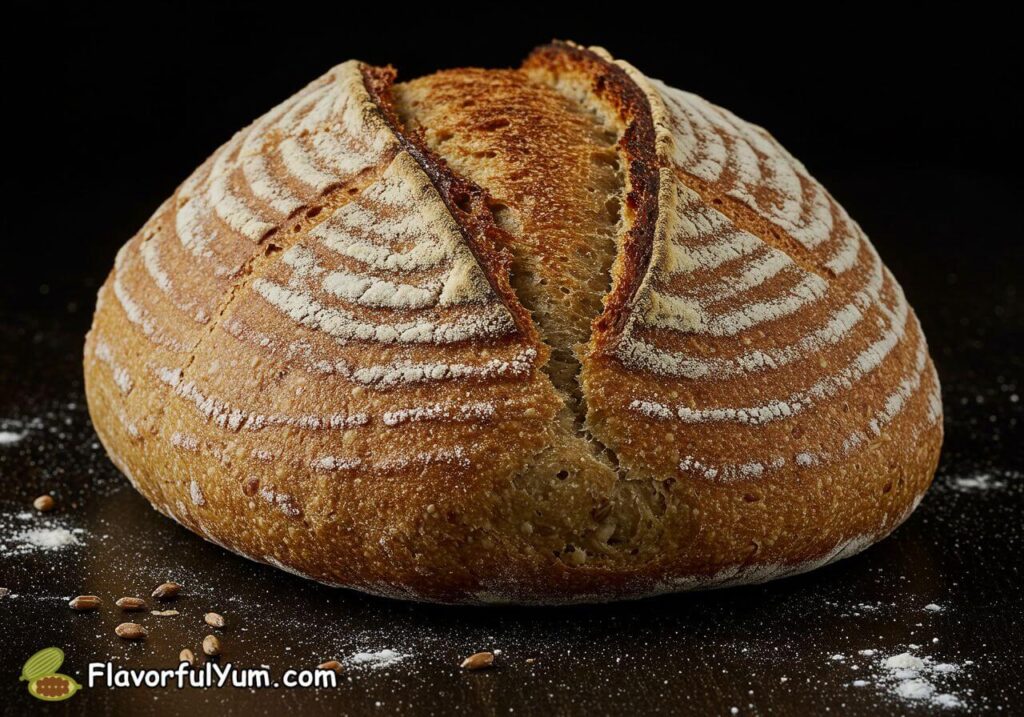
You can make beautiful, bakery-style gluten-free bread at home. This recipe shows you how. It has a nice, rustic look and a great crust.
- 2 cups of your homemade gluten-free flour blend
- 1 ½ teaspoons of active dry yeast
- 1 teaspoon of salt
- 1 ¼ cups of warm water
- 2 tablespoons of olive oil
- 1 teaspoon of apple cider vinegar
I mix the dry ingredients in a bowl. Then I add the wet ingredients. I mix until everything is combined. The dough will be very sticky. I let it sit for 10 minutes. I scrape the dough onto a piece of parchment paper. I shape it into a round loaf. The dough will be soft. I let it rise in a warm place for about 45 minutes. It will get a little puffy.
I preheat my oven to 450°F (230°C). I put a baking stone or a heavy baking sheet in the oven while it heats up. When the oven is hot, I place the parchment paper with the dough onto the hot stone. I also put a pan with water on the bottom rack of the oven. The steam helps create a good crust. I bake it for about 20 to 25 minutes. The bread will be golden brown. I let it cool completely on a wire rack. The crust is crunchy. The inside is soft.
Recipe 3: The Fluffy Dinner Rolls

This is a great project. It is smaller and gives you a good result. It shows that you can get a soft and airy texture.
- 1 cup of warm milk
- 1 tablespoon of sugar
- 2 ¼ teaspoons of active dry yeast
- 2 cups of your homemade gluten-free flour blend
- 1 teaspoon of baking powder
- ½ teaspoon of salt
- 2 tablespoons of melted butter
- 1 large egg
I mix the warm milk, sugar, and yeast in a bowl. I let it sit for about 5 minutes until it is foamy. In another bowl, I mix the flour, baking powder, and salt. I add the melted butter and egg to the yeast mixture. I whisk it. I pour the wet ingredients into the dry ingredients. I mix until everything is combined. The dough will be soft and sticky.
I scoop the dough into a greased muffin pan. I use a tablespoon to scoop it. I fill each cup about halfway. I let them rise for about 30 minutes. I preheat my oven to 375°F (190°C). I bake the rolls for about 15 to 20 minutes. They will be golden brown. The rolls are soft. They are perfect for dinner.
Your Fluffy, Gluten-Free Journey Begins Now
You do not have to settle for bad gluten-free bread. You have the knowledge now. You know how to make the right flour blend. You know that hydration is important. You know you do not need to knead the dough. These simple things will change your baking.
The days of dense, flavorless bread are over. You can create your own light and airy loaves. You can have a sandwich on bread that does not fall apart. You can have toast that is soft inside.
What is the first gluten-free recipe you are excited to try?

It’s Eliana Hazel. I’m a 33-year-old wife and mom of two from Tennessee who loves cooking fresh, simple meals for my family. I shop for veggies at Walmart, try new recipes, and add my own twist to make them special. When I’m not in the kitchen, I enjoy yoga, meditation, and catching up with my friends over green smoothies. Here, I share family-tested recipes, easy cooking tips, and a little inspiration to make your kitchen a happy place.
Related Posts


Previous Post
Next Post


Hey, y’all! I’m Hazel!
I’m SO happy you’re here! I’m passionate about cooking fresh, homemade meals for my family and love sharing recipes that are simple, healthy, and full of flavor. Here on my blog, I believe in making food with love, experimenting with ingredients, and turning everyday meals into something special. In short, I believe that cooking at home brings families closer and makes life more joyful. >>> Learn more